Have you ever seen a beautiful picture—a beloved cartoon character, a unique logo, or even a child’s drawing—and wished you could turn it into a real 3D object? For 3D printing enthusiasts, this dream often hits a wall: complex modeling software, steep learning curves, and endless file format headaches.
Now, with Hitem3D, that wall is gone. Whether you own a single-color FDM printer or a multi-color setup with an automatic material system (AMS), this guide will walk you through the entire journey—from a simple photo to a finished 3D print.
Three workflows await you:
- Standard 3D printing workflow: Perfect for lithophanes, relief models, and textured objects
- Multi-color 3D printing workflow: Ideal for logos, characters, and designs where colors matter
- Full-color 3D printing workflow: For creators who want photo-realistic color reproduction
Let’s dive in.
What you’ll need
| Hardware | Software | Material |
|---|---|---|
| Any FDM 3D printer | Hitem3D | A clear photo or image |
| (Multi-color) AMS or multi-filament system | Hitem3D and your slicer (e.g. Bambu Studio, OrcaSlicer, Creality Print) | PLA filament (recommended for beginners) |
| (Full-color) UV 3D printer | — | UV-curable ink / resin (printer-specific) |
Part 1: Common Steps (All Workflows)
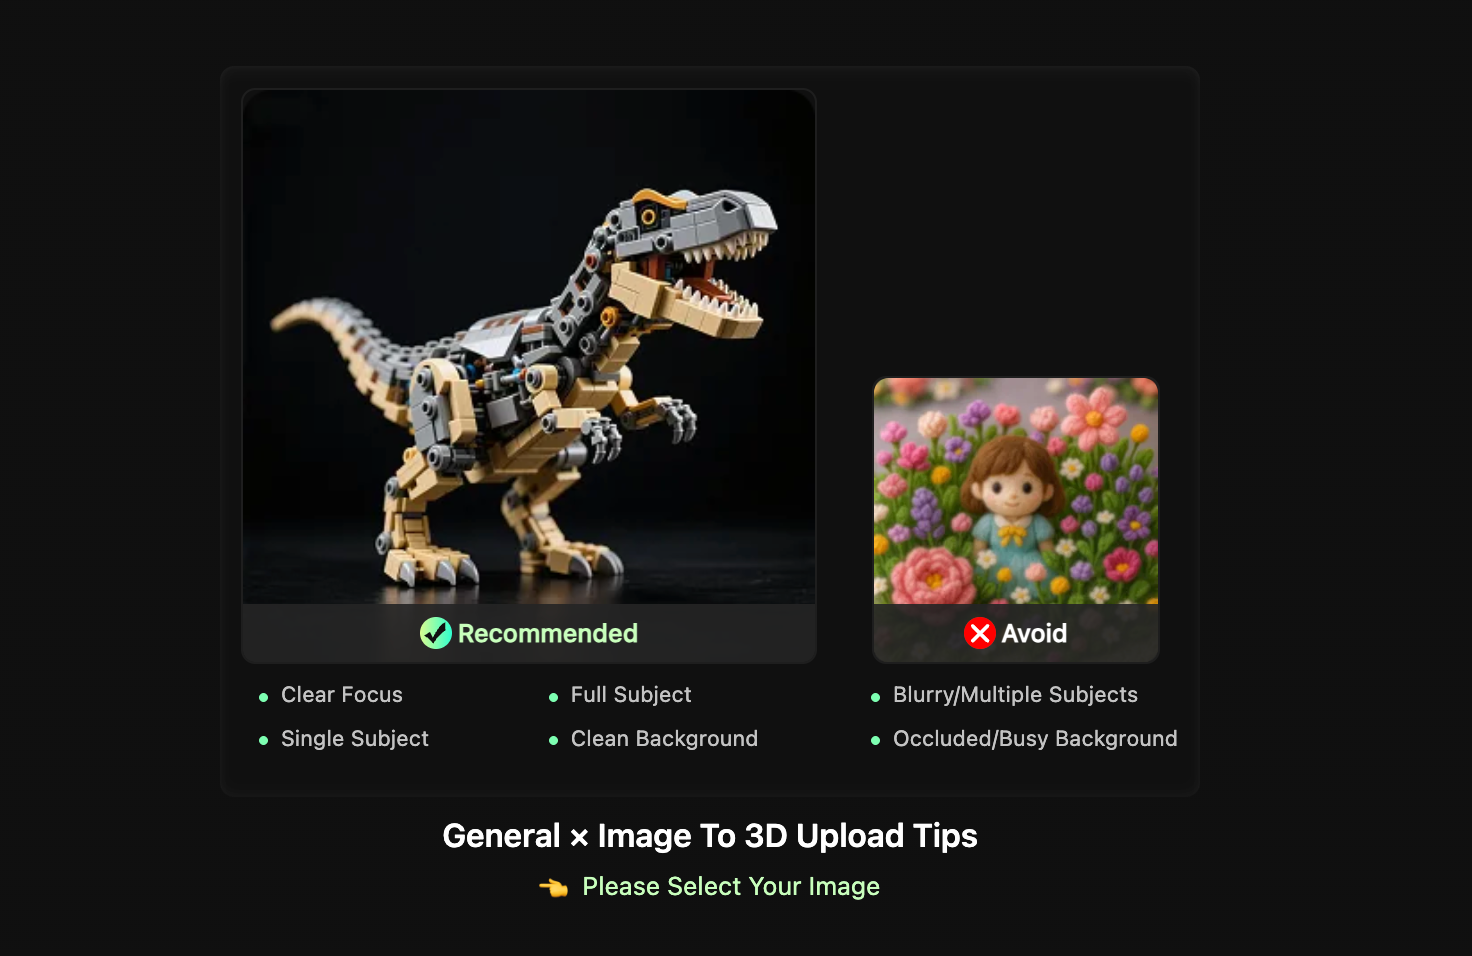
Step 1: Choose the Right Image
The quality of your input image directly determines the quality of your 3D model — it’s worth getting this step right.
- Single subject, clean background. Pick an image with one clearly defined subject and a simple or transparent background. Avoid cluttered scenes, multiple objects, or anything cut off at the edges. The subject should face forward and fill most of the frame.
- Sharp focus, no blur. Make sure the entire subject is in focus. Blurry or motion-smeared images significantly reduce the accuracy of shape reconstruction.
- Soft, even lighting. Diffused, even lighting works best. Harsh shadows or strong side lighting can confuse the AI’s shape estimation. For real objects, shoot outdoors on an overcast day or use a lightbox. For digital illustrations, remove the background layer and export a transparent-background version before uploading.
f your image doesn’t quite meet these standards, a quick edit goes a long way — try a background removal tool, or adjust brightness and contrast before uploading.
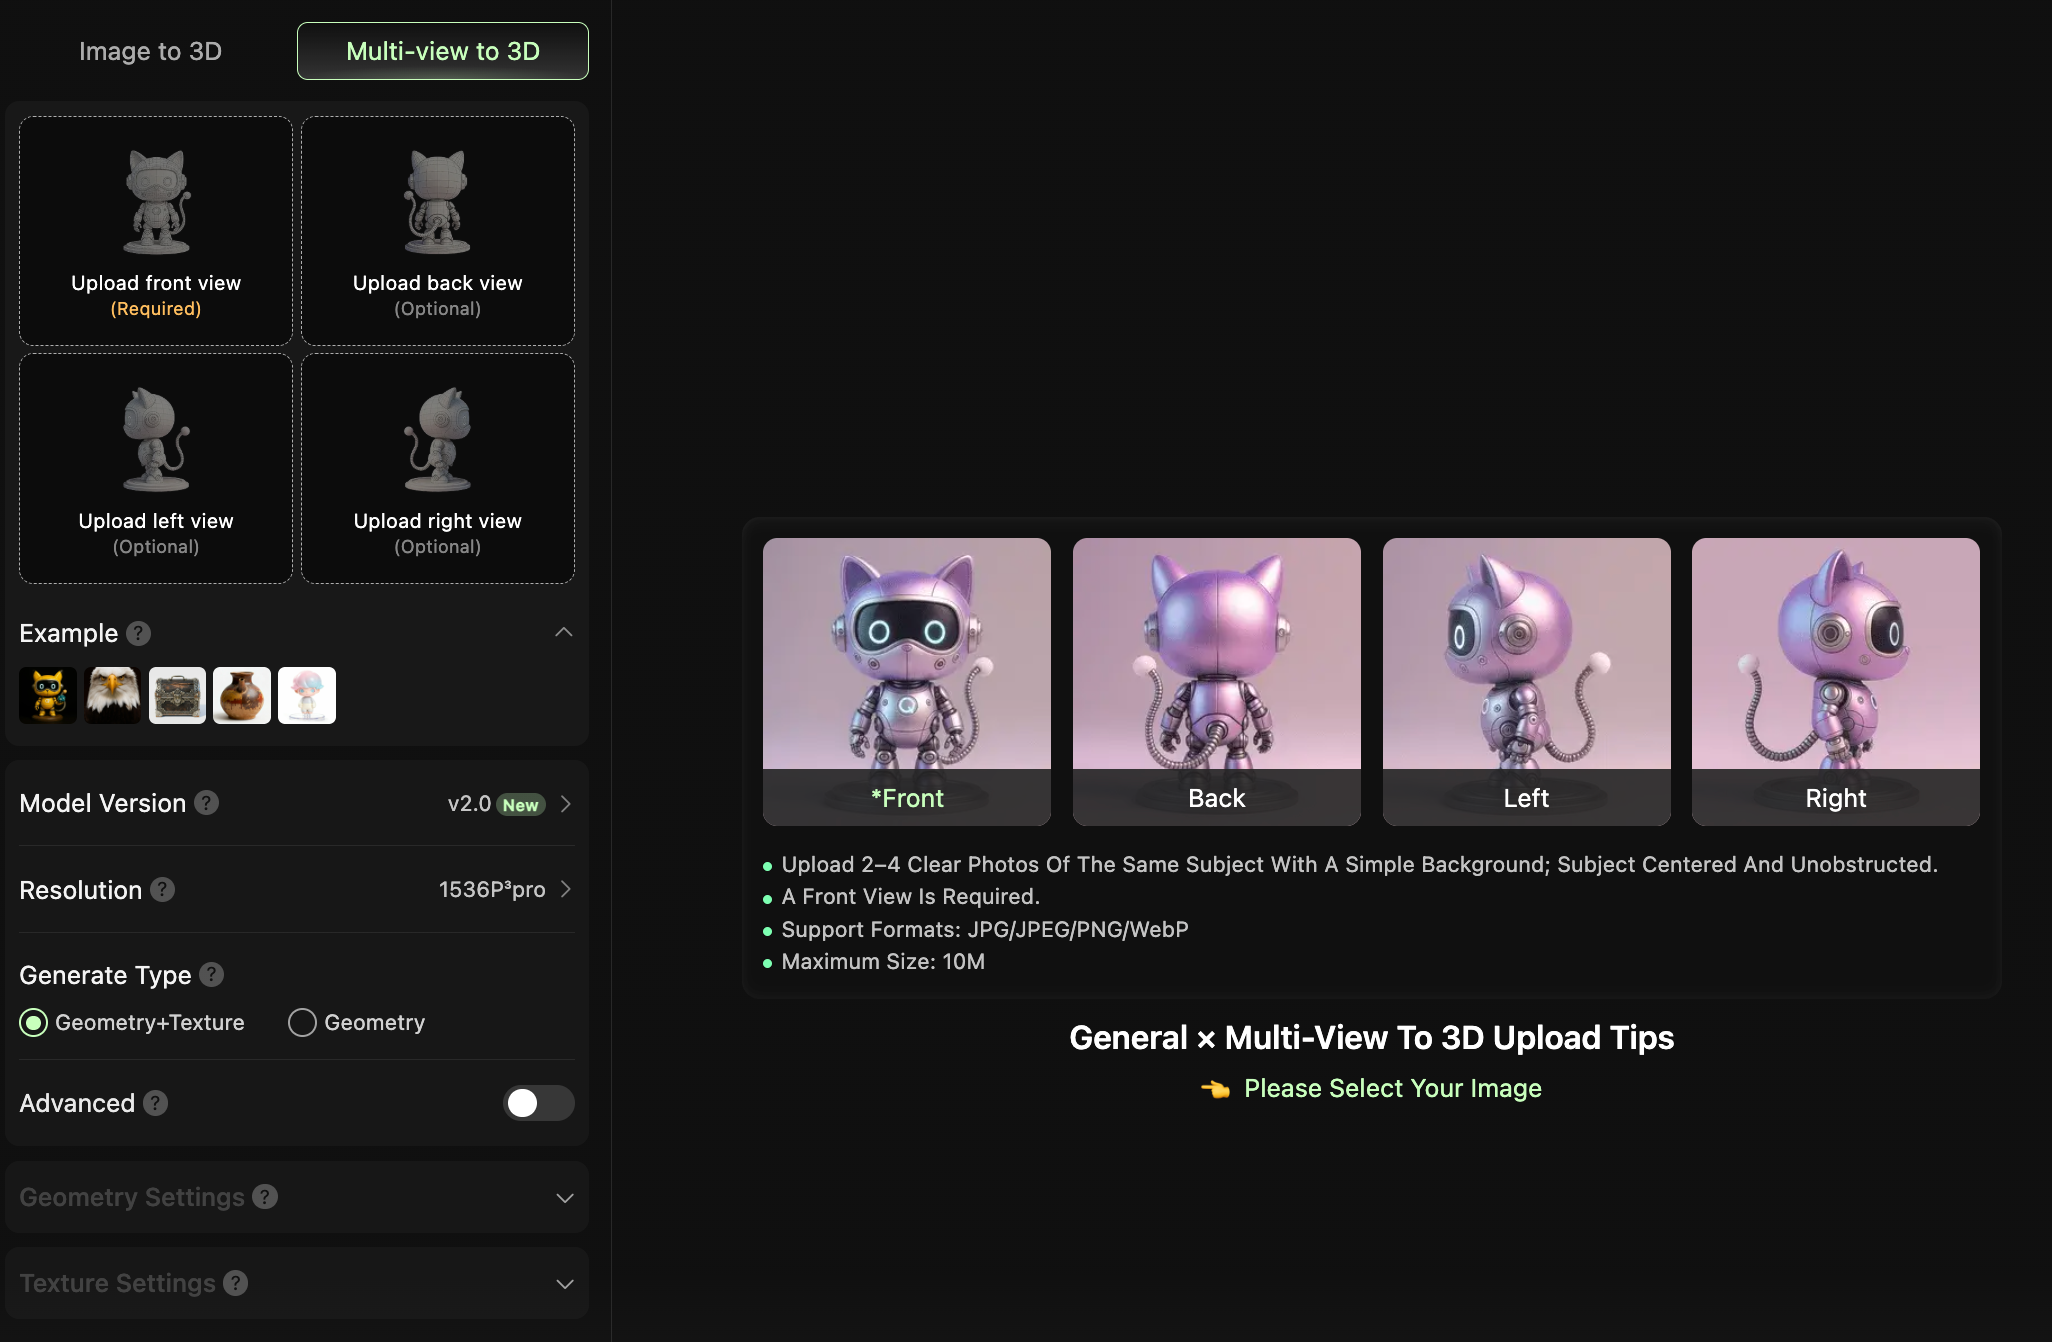
Step 2: Upload Your Image and Generate the 3D Model
Once your image is ready, head to HiTEM3D’s Creative Space, upload your file, and select the Image-to-3D mode. The AI will analyze the shape and surface detail in your photo and generate a complete 3D model — geometry and texture included.
Which generation mode should you use?
- Single Image Mode: Best for simple, symmetrical, or front-facing subjects — logos, flat illustrations, relief designs. It’s the fastest option and works well for most use cases.
- Multi-View Mode: If your subject has important details on the sides or back (characters, figurines, anything with real depth), upload 2–4 photos from different angles. More viewpoints give the AI a fuller picture of the object’s structure, resulting in noticeably better geometry — especially for rounded or non-flat shapes.
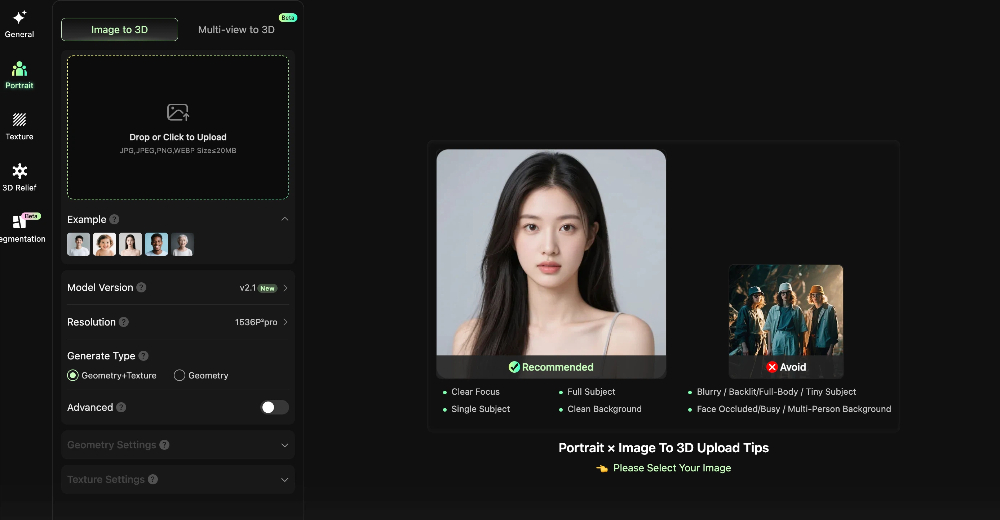
- Portrait Mode: Optimized for bust or half-body portraits where facial detail matters. If you’re turning a photo of a person into a 3D-printed figure, this mode delivers significantly better facial accuracy.
Step 3: Configure Generation Parameters
After uploading your reference image, the left panel offers a set of parameters to configure. Each choice directly affects the quality and printability of your final model. Here’s a breakdown of each option.
1. Model Version
Two versions are available in General Mode: v1.5 and v2.0 (recommended). v1.5 offers more stable geometry generation, making it better suited for cases where structural precision is critical and texture quality is a secondary concern. v2.0 delivers significantly improved texture fidelity, producing results that are more ready for post-print painting or display. For 3D printing purposes, v2.0 is the recommended choice.
2. Resolution
General Mode provides two resolution tiers: 1536P³ and 1536P³ Pro. The former is designed for high-precision reconstruction of intricate, complex structures, while the latter is positioned as a flagship commercial-grade option with higher output quality that’s ready to send directly to print. If your end goal is a physical print, 1536P³ Pro is strongly recommended — it retains more surface detail and reduces the need for manual mesh repair later.
3. Generation Type
Two options are available: Geometry + Texture and Geometry Only. If you’re still iterating on the model’s structure, Geometry Only saves both generation time and credit usage. Once you’re satisfied with the structure and ready for final output, switch to Geometry + Texture to get a complete model with materials. For the final generation in a printing workflow, Geometry + Texture is recommended.
4. Advanced Settings (Optional)
Advanced Settings are intended for users who have a clear expectation of their model output and want fine-grained control over specific parameters for their use case. Once enabled, you can manually configure geometry mode, polygon count, geometry repair, and UV unwrapping — rather than relying entirely on system defaults. If you’re just running a quick test, keeping the defaults is fine. For final output, it’s worth opening Advanced Settings to tailor the configuration to your printing process (FDM vs. SLA) and post-processing needs.
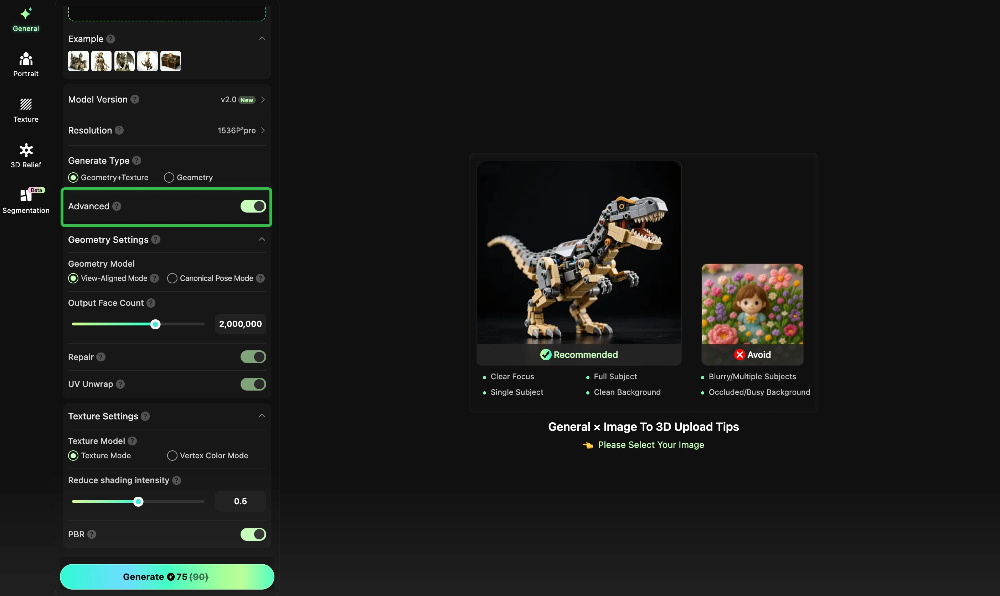
- Geometry Mode: Two modes are available — View-Aligned and Standard Pose. View-Aligned prioritizes matching the front of the generated model closely to the input image, but the back of the model may lack structural coherence. Standard Pose prioritizes a well-formed, structurally stable 3D shape that holds up from all angles — making it the better choice for printable models. For printing, always select Standard Pose.
- Output Face Count: The slider controls the number of polygons in the model, with a default of 2,000,000 (2 million faces). Higher counts yield more detail but also increase file size. For FDM printing, very high polygon counts offer diminishing returns since the slicer handles mesh processing automatically. For resin or high-precision SLA printing, maintaining a high polygon count better preserves fine surface detail. The default of 2 million is sufficient for most printing needs; increase it only if you require maximum detail.
- Repair: A toggle option — keep it on at all times. It automatically fixes common mesh issues such as non-manifold edges and self-intersections. Left unaddressed, these issues will cause errors in your slicer or outright print failures.
- UV Unwrap: A toggle option — recommended on. UV unwrapping generates texture coordinates for the model, making it easier to edit textures or repaint the surface in tools like Blender. If your print only needs a single color and requires no post-processing with textures, you can turn this off to save processing time.
If the output isn’t what you were looking for, you can regenerate at no extra cost — up to 3 free retries per task without spending additional credits.
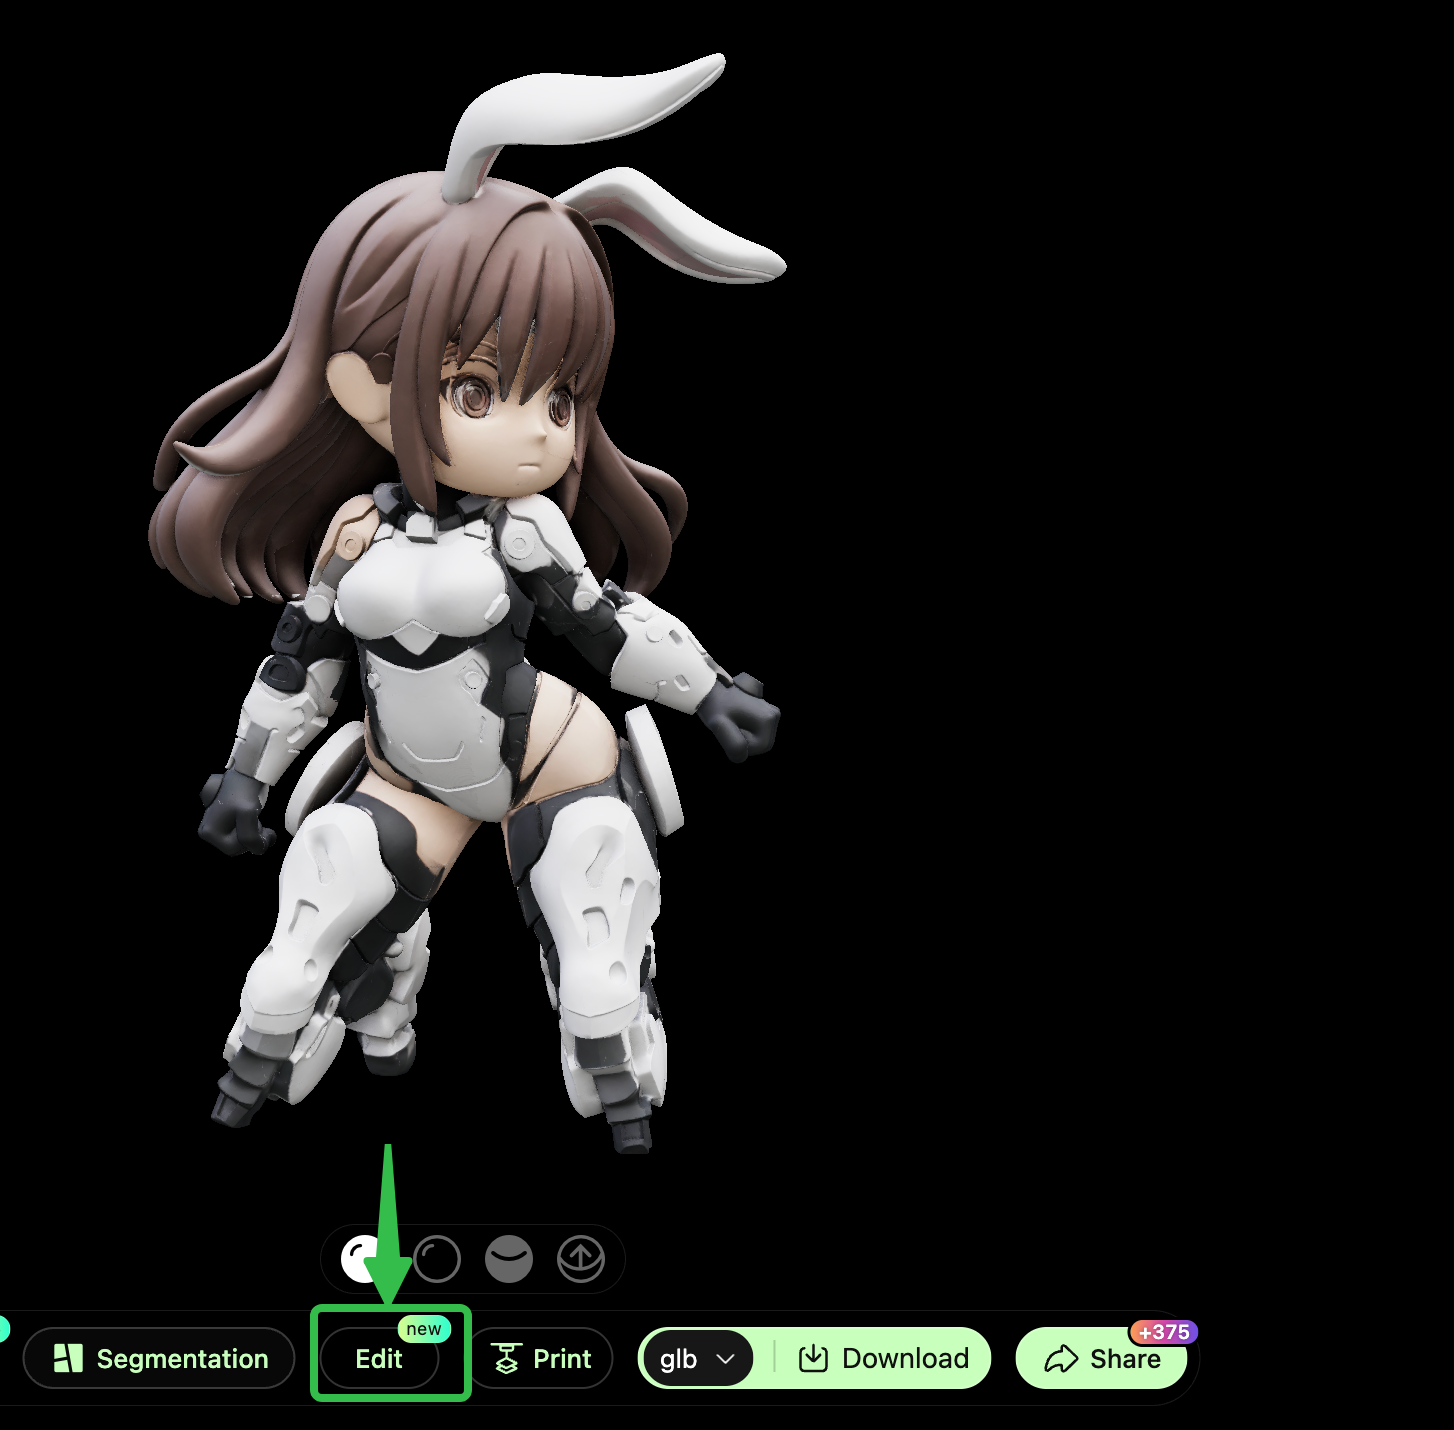
Step 4: In-Browser Model Detection & Repair (A Critical Step Before Export)
Before sending your model to the slicer, let Hitem3D check if it’s actually printable. No manual troubleshooting needed. In the editing panel:
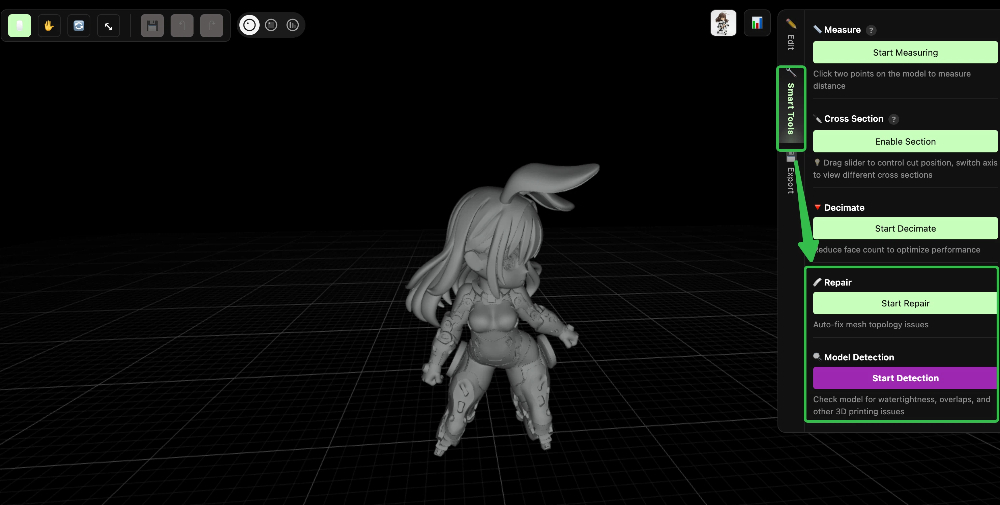
- Click “Smart Tools → Model Detection → Start Detection” — Hitem3D automatically scans your model for common 3D printing issues: watertightness (holes in the mesh), non-manifold edges, overlapping faces, and thin walls or fragile areas.
- Click “Smart Tools → Model Repair → Start Repair” — Hitem3D automatically fixes everything it finds. Holes get filled, edges get corrected, and the mesh gets cleaned up — all in one click.
✅ A printable model must be watertight (no holes). Hitem3D’s two-step detection + repair process handles this for you — no Blender, no Meshmixer, no headache.
Other editing tools are available if you need them — scale, rotate, trim, smooth surface, add a base, and more. But for most users, running detection + repair is all it takes before moving on to the next step.
Part 2: Choose Your Printing Path
Once your model has passed detection and repair, you’re ready to move forward — either send it directly to your slicer or download the file locally. Choose the path that fits your printer type and creative goal:
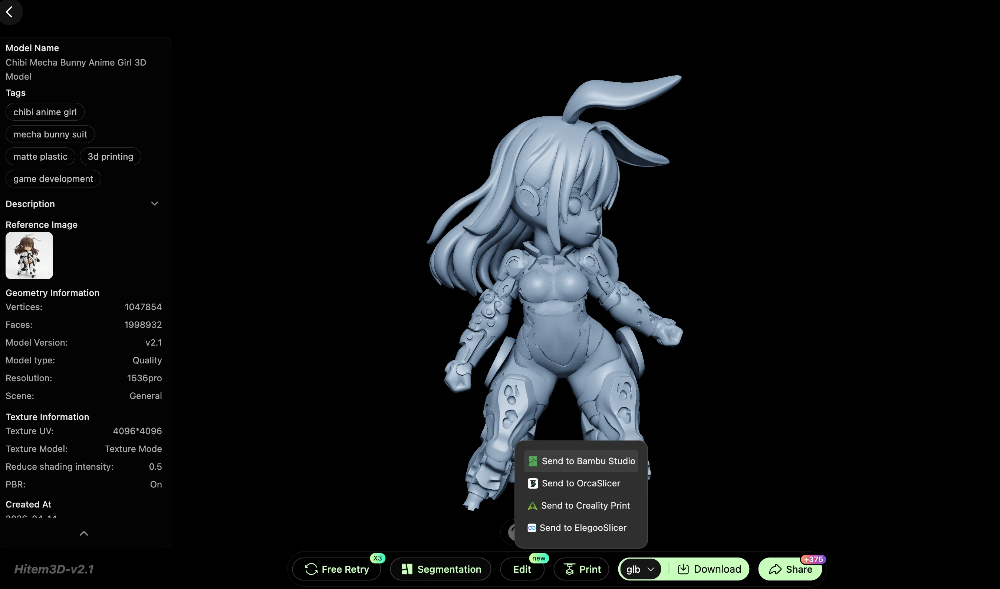
Path A: Standard 3D Printing (Single-Color)
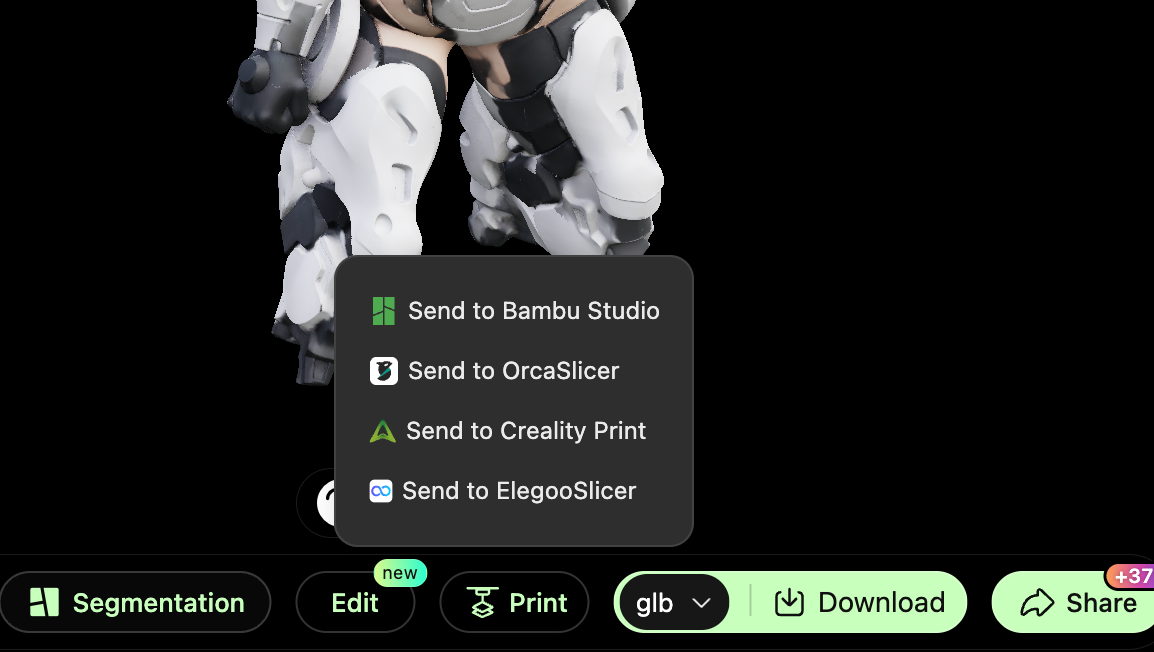
Best for single-color FDM printers. Once your model is ready, send it to Bambu Studio or any slicer with one click, or download the STL/OBJ file and import it into your preferred tool. Then slice and print.
Please note that if you choose to send the model directly to Bambu Studio or similar software, the slicer must be installed and you must be logged in; otherwise, the automatic handoff will not work.
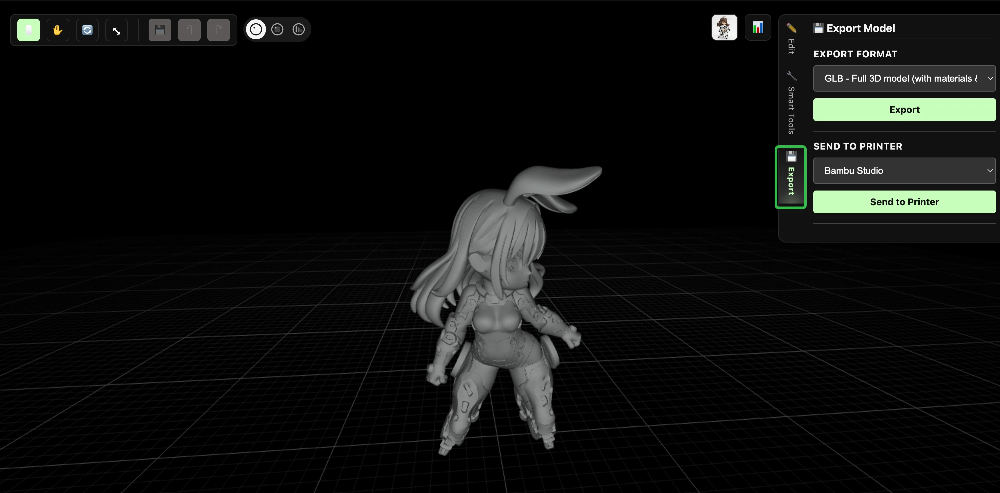
For exporting, there are two available options.
You can export and send the model directly to the printer immediately after generation, which is ideal for quick printing workflows.
Alternatively, after the model has passed printability detection and automatic repair, you can export the file manually from the editor, which is better suited for workflows that require further adjustments or file management.
Best suited for: lithophanes and relief prints, decorative models and figurines with rich surface texture, and functional prints where color differentiation isn’t needed (such as parts, bases, or enclosures).
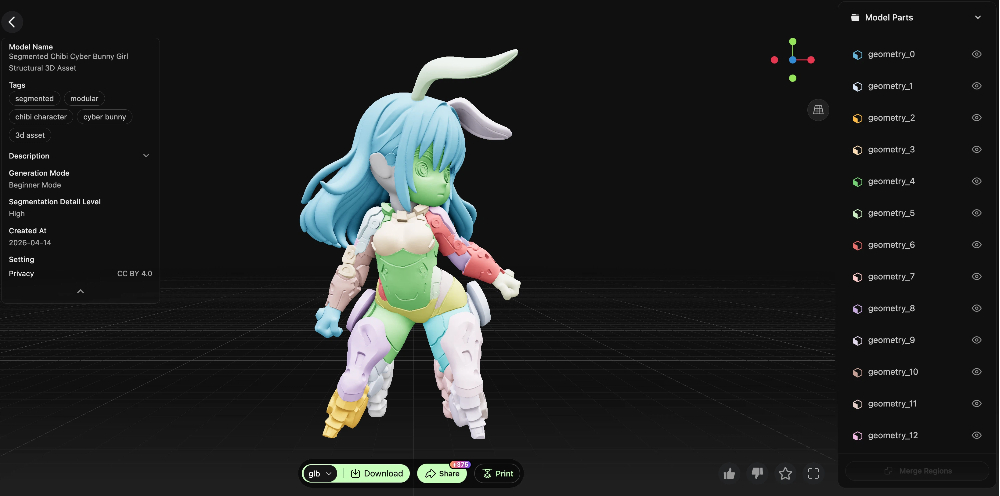
Path B: Multi-Color 3D Printing (with AMS)
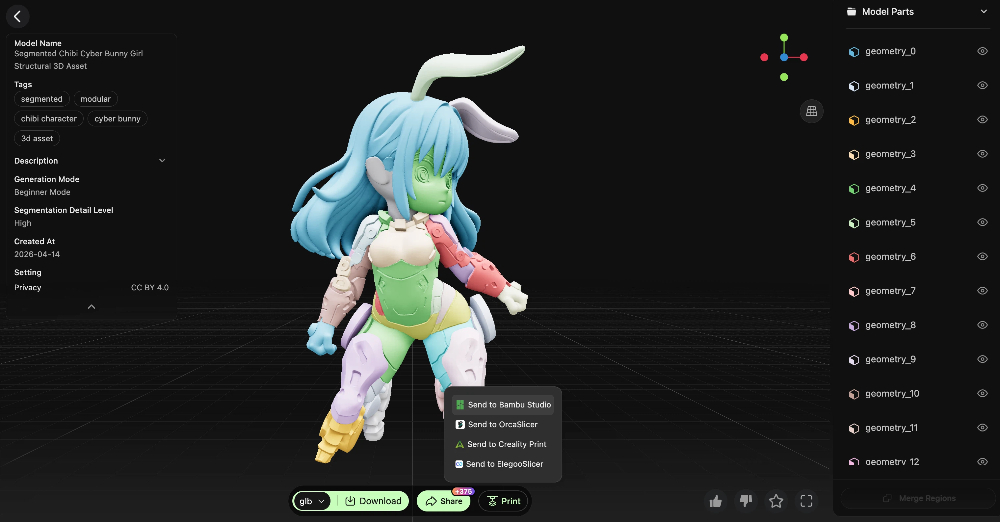
Best for printers equipped with an Automatic Material System (AMS). Before sending to the slicer, you can use Hitem3D’s Segmentation feature — it automatically identifies color regions on your model and separates them into distinct print zones, no manual modeling required. This is especially valuable for logos, character models, and any design where color placement matters, turning what used to be a tedious manual process into a one-click operation.

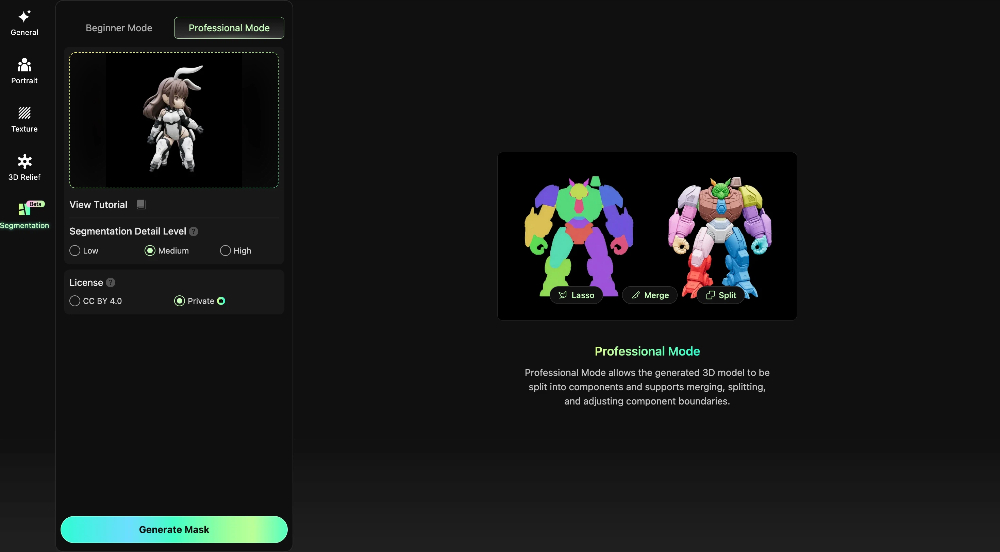
Hitem3D offers two segmentation modes to suit different skill levels:
- Basic Mode: One-click segmentation with no manual configuration needed. The system automatically detects and assigns color zones, giving you a ready-to-use result right away — ideal for users who want to get started quickly.
- Pro Mode: Builds on automatic segmentation with full mask editing support. Use Lasso to make precise selections, Merge to combine color zones, and Split to break them apart — giving you complete control over the final segmentation result. Best for users with specific color requirements or more complex designs.
Once segmentation is complete, send directly to your slicer with one click.
Best suited for: IP characters and figures with defined color schemes, brand logos and graphic designs, and decorative pieces where distinct color zones are part of the design.
Path C: Full-Color 3D Printing
Best for full-color capable printers. Hitem3D generates models with high-fidelity texture maps that are ready for full-color printing workflows out of the box, faithfully reproducing the colors from your original image with minimal post-processing.
Best suited for: photo-realistic portrait or scene models, artistic pieces with rich color gradients, and display-grade work where visual accuracy is the top priority.
Best suited for: photo-realistic portrait or scene models, artistic pieces with rich color gradients, and display-grade work where visual accuracy is the top priority.
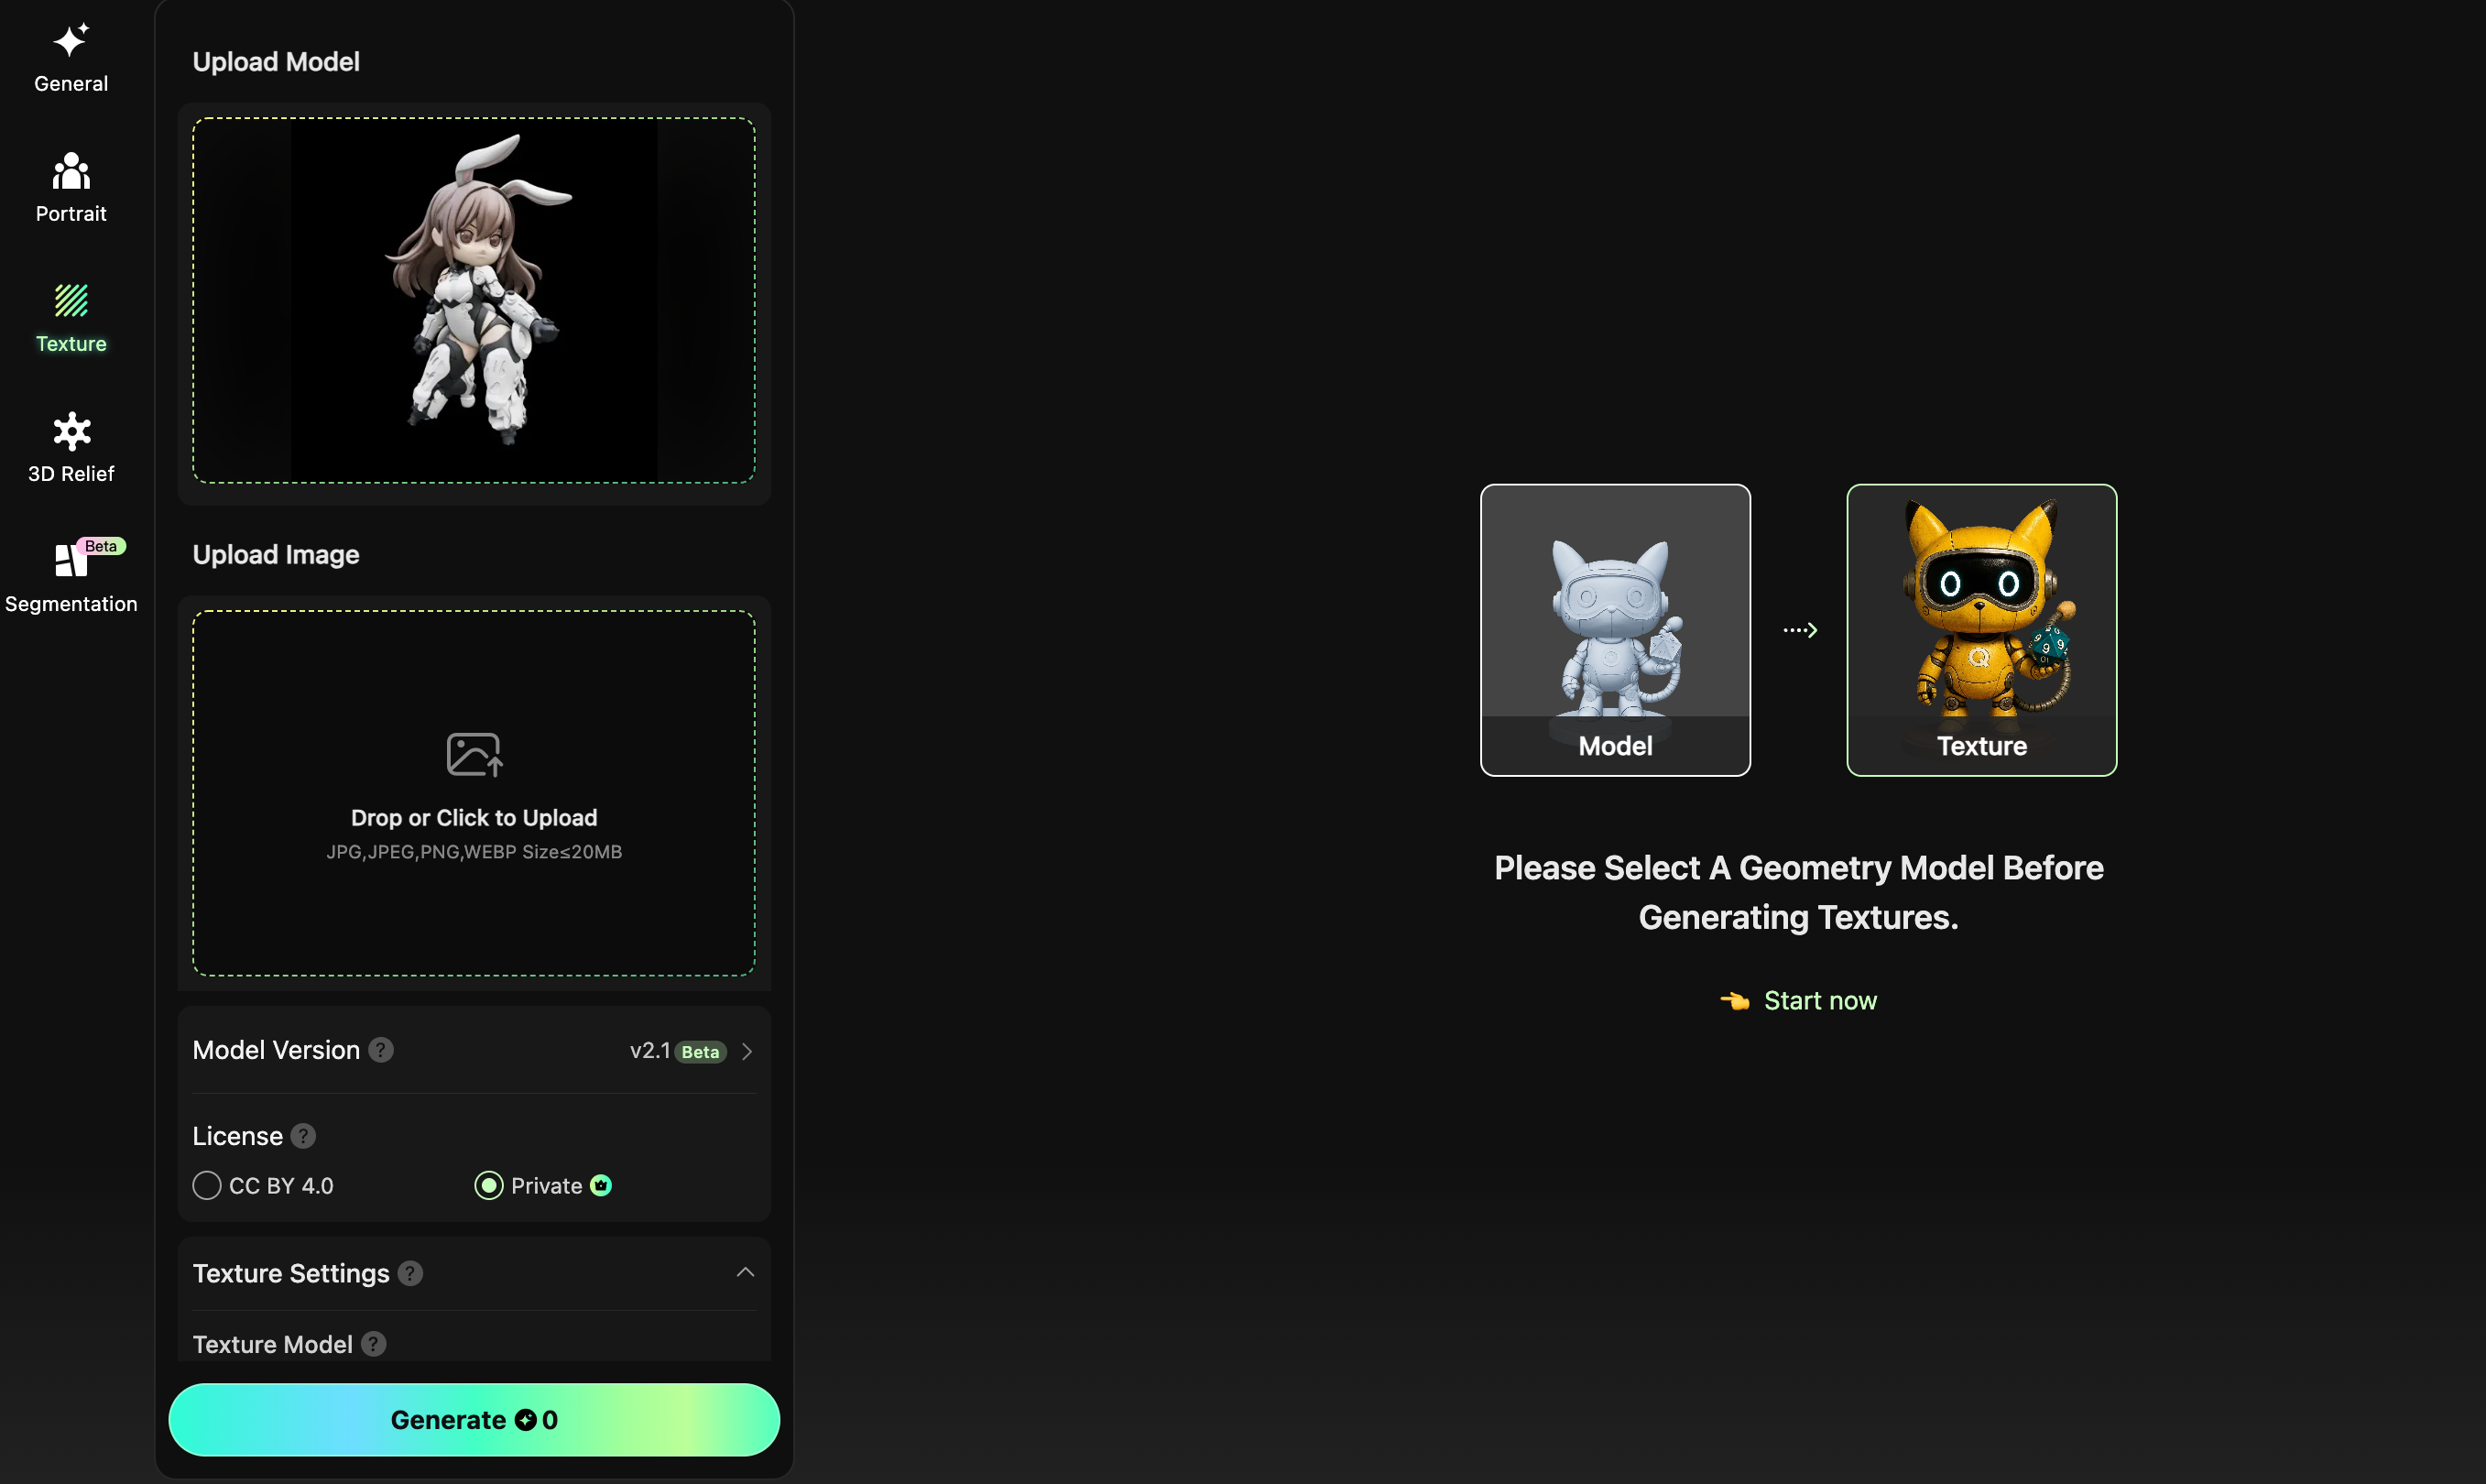
Want a Different Look? Try AI Texture
If the default generated texture isn’t quite what you had in mind, or you want to give your model a completely different material style, Hitem3D’s Texture feature lets you do exactly that. Import your generated model into the AI Texture tool, then upload a reference image of the texture style you want — AI will restyle the model’s surface based on your input. Whether it’s metallic, wood grain, camouflage, or cyberpunk, experiment freely before you export and print only when it looks exactly right.
Part 3: Slicing & Printing (Using Bambu Lab as an Example)
- Once the model is ready in Hittem3D, click Print to send it directly to Bambu Studio.
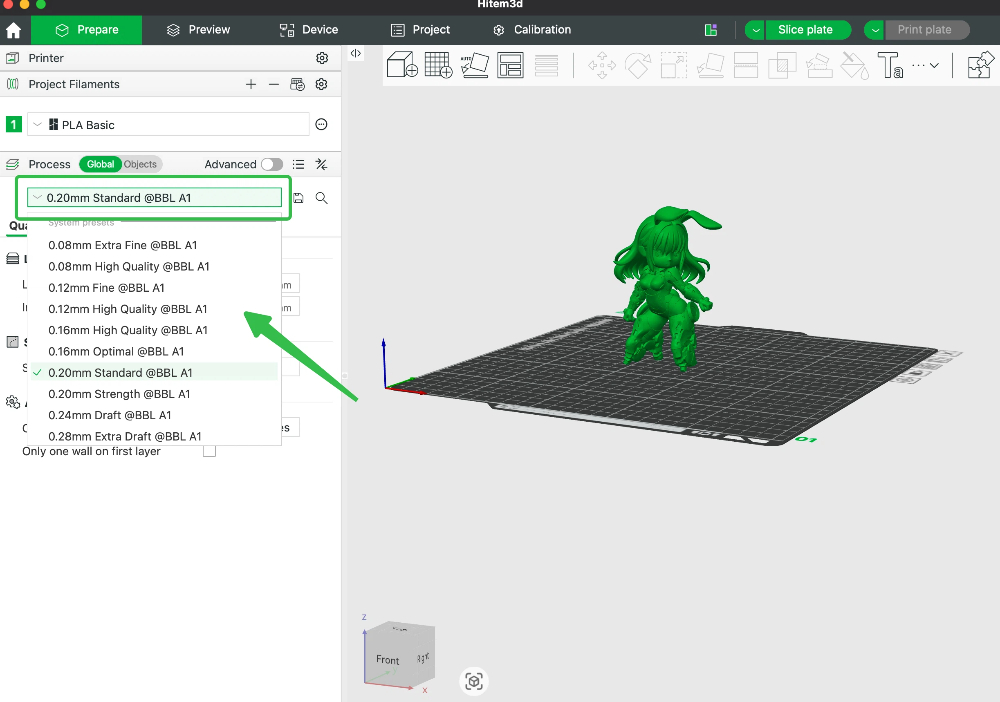
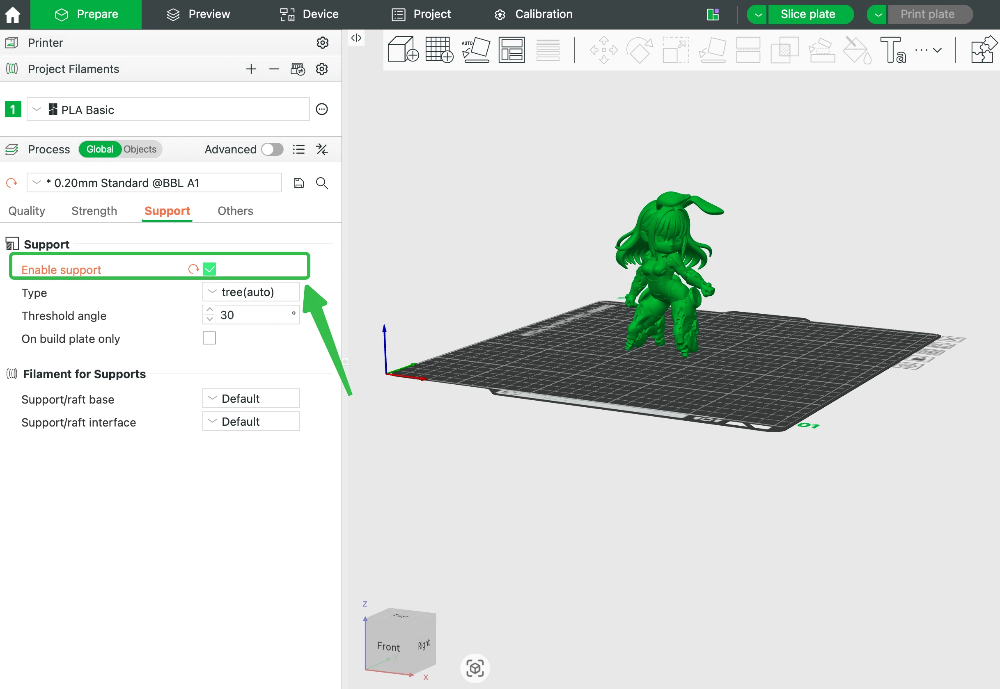
- Select the layer height based on the level of detail you need — a smaller layer height means a higher surface resolution. Once selected, enable Supports.
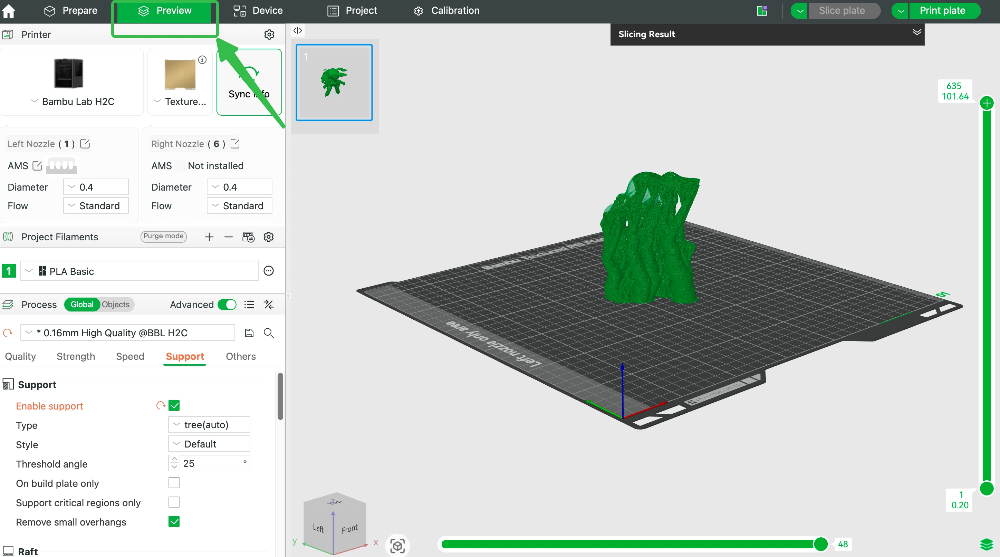
- Click Preview to begin slicing. After slicing is complete, click Print Plate, then choose the filament color loaded on your machine.
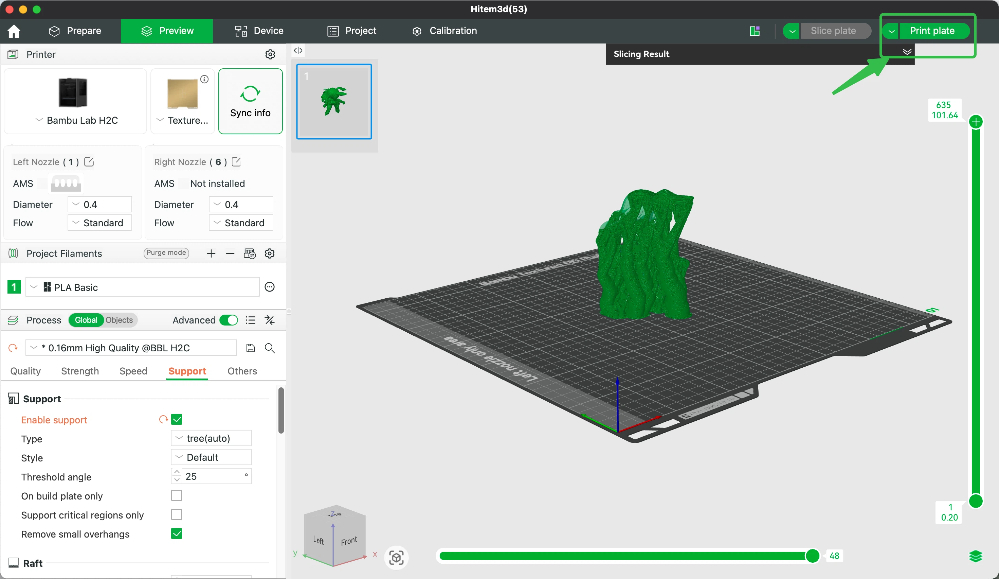
- Send the job to the printer and start printing.
FAQ
Q: My Bambu Studio doesn’t receive the “Send to Slicer” command?
Make sure Bambu Studio is already open. If it still doesn’t work, download as 3MF and open manually.
Q: Can I use PETG instead of PLA?
Yes. PLA is just the most forgiving. Adjust temperatures in Bambu Studio accordingly.
Q: Why are my multi-color prints “bleeding” at the edges?
Increase “Flush Volume” in AMS settings, or enable “Prime Tower”. Both help clean the nozzle between color changes.
Q: Do I always need supports for overhangs?
No. Under 45° usually prints fine without. Trust HiTEM3D’s printability check.
Conclusion
That’s it. Three shared steps, then choose your path, then slice and print. No complex CAD software, no manual texture painting, no guesswork.
Grab a photo and give it a try. The first time you see a flat image become something you can hold in your hand, you’ll be hooked.
Happy printing! Try Now👉 https://www.hitem3d.ai