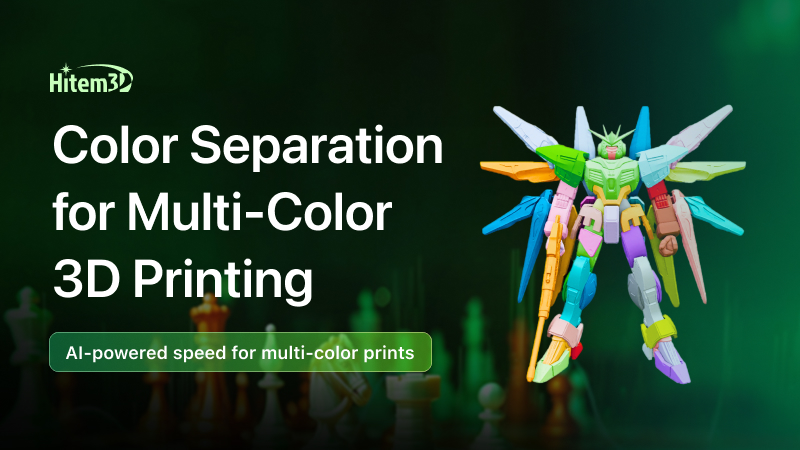
From dual-color FDM to full-color MJF, 3D printers are getting more powerful every year—but is your model actually ready?
You Might Be Getting One Thing Wrong
Over the past two years, the pace of innovation in multicolor 3D printing hardware has been nothing short of explosive.
Desktop machines have changed dramatically. Systems with automatic material switching have made four-color printing feel as simple as pressing a button. On the industrial side, technologies like MJF, PolyJet, and color SLS offer color fidelity that rivals injection molding—at prices ranging from tens of thousands to millions.
All of this has led many people to a natural but misleading assumption: buy a multicolor printer, and multicolor prints will be easy.
Reality quickly proves otherwise.
You import a model, open your slicer, hit print—and suddenly realize the printer has no idea where each color is supposed to go. The reason is simple: most OBJ files were never designed with color in mind. By default, they are completely monochrome.
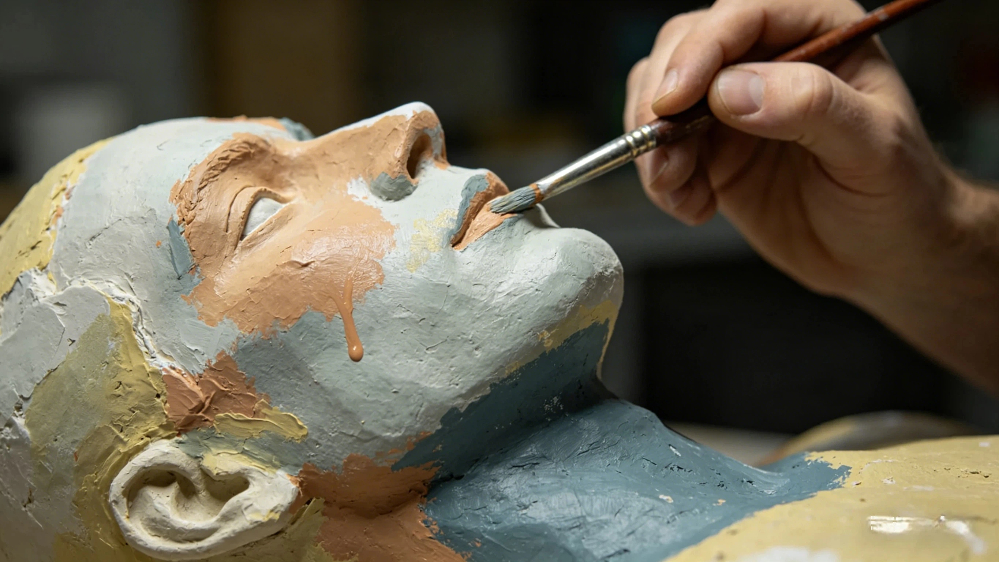
So you try manual painting. After an hour of tweaking, you print the model and discover a new set of problems.
Color boundaries look soft and imprecise. Red bleeds into blue. Curved surfaces show obvious color contamination. Small gaps that should be white turn gray.
At first glance, it feels like a hardware limitation.
In reality, the problem started much earlier.
The model itself was never properly segmented into color regions.
This Is the “Last Mile” of Multicolor 3D Printing
No matter whether your printer costs a few hundred dollars or several hundred thousand, the outcome depends on one final step: model color segmentation.
If that step is not done correctly, everything downstream—slicing, material switching, even the most advanced hardware—becomes ineffective.
This is the true “last mile” of multicolor 3D printing. And if you get it wrong, nothing else really matters.
First Things First: How Do Multicolor 3D Printers Actually “See” Color?
To understand why model color segmentation matters so much, we need to start with the fundamentals—how different multicolor 3D printing technologies work in the first place.
Dual‑Color / Multicolor FDM Printing (Material Switching)
Typical machines include desktop systems equipped with multi‑material units that feed several filaments into a single nozzle.
The principle is straightforward. The printer has multiple material inputs and switches filaments at a specified layer height or print stage, then continues printing with a different color.
The critical limitation is this: the printer itself does not understand color.
It only follows instructions such as, “After layer 152, switch to red filament.”
Where red should appear, and where blue should remain, is determined entirely by the model file or the slicing data you provide.
This means that if your model does not explicitly define which region is red, the slicer cannot generate correct material‑switching instructions. The result is either a single‑color print, or completely incorrect color changes.
Full‑Color 3D Printing (Inkjet‑Based Processes)
Representative technologies include MJF, PolyJet, and full‑color SLS systems.
These processes work more like a 2D inkjet printer. As powder or photopolymer layers are deposited, print heads spray colored binders or colored resins layer by layer, gradually building a full‑color object.
The limitation here is even stricter. These machines demand much richer input data. A printable model must not only define color regions, but also include accurate texture maps (UV maps) and vertex color information. If color boundaries in the model are vague or poorly defined, the final print will look as if the colors have bled together—much like watercolor spreading on wet paper.
The Conclusion Is Clear
Whether you are using a desktop FDM printer that costs a few thousand, or an industrial full‑color system that costs hundreds of thousands, the starting point is the same: you need a model with properly defined color regions.
Hardware determines how colors are deposited.
Model color segmentation determines where those colors go.
And that second problem is a prerequisite for every multicolor 3D printing technology that exists today.
What Makes Good Model Color Segmentation? Two Core Standards
Not every model with a few painted areas is truly “color‑segmented.”
A multicolor model that is genuinely ready for printing must meet two fundamental standards.
Standard 1: Clear, Logical Color Boundaries
In a well‑segmented model, color boundaries should be clear, smooth, and continuous. Just as importantly, those boundaries should follow the logic of the geometry itself—transitioning at natural breaks such as grooves, recesses, seams, or parting lines, rather than slicing straight through the middle of a curved surface.
Why does this matter?
In FDM printing with material switching, the nozzle goes through a brief pause–switch–resume cycle at every color boundary. If the boundary is fuzzy or poorly placed, excess material during this transition can cause color bleeding, stringing, and visible artifacts. Clean geometry‑aligned boundaries dramatically reduce these issues.
Standard 2: The Model Must Be Truly “Print‑Ready”
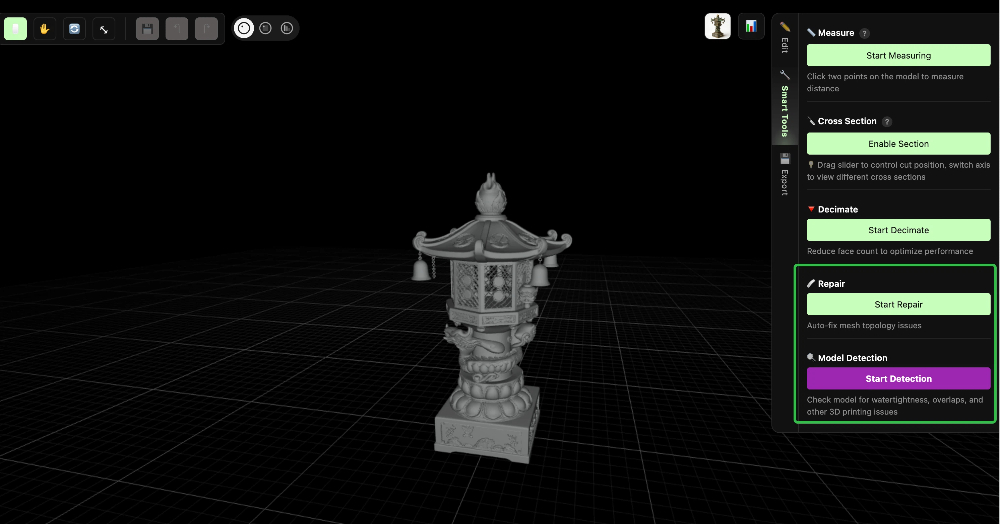
Before any color segmentation happens, the model itself must already be printable. That means it needs to be watertight and free of non‑manifold geometry. If these conditions are not met, even perfectly planned color regions can still result in a failed print.
These two concepts are worth unpacking in more detail.
Practical Basics: Watertightness and Non‑Manifold Geometry
These are two of the most common pitfalls for beginners in 3D printing. If you have ever searched for “why 3D prints fail,” chances are you have seen both terms come up repeatedly.
What Does “Watertight” Mean?
In simple terms, a watertight model is like an airtight balloon.
From a geometric perspective, watertightness means that every face in the model connects properly to its neighbors, with no holes, gaps, or cracks. Put another way: if you filled the model with water, nothing would leak out.
Why does this matter?
Slicing software needs to know exactly where the inside of the model ends and the outside begins. If the mesh contains holes, the slicer cannot reliably determine which areas should be solid and which should be empty, leading to slicing errors or outright print failures.
Common symptoms include missing surfaces, broken layers, or chaotic support generation.
What Is Non‑Manifold Geometry?
The term sounds intimidating, but the idea is straightforward.
In 3D modeling, a manifold mesh means that each edge is shared by no more than two faces. If an edge is shared by three or more faces, or if a surface has zero thickness (like a sheet of paper), the geometry becomes non‑manifold.
Intuitive examples include:
- Two cubes connected only by a single edge
- A surface with no thickness at all
- One edge connected to three different faces
Why does this matter?
Slicing software cannot interpret zero‑thickness surfaces or ambiguous connections. When such models are imported, the result can range from slicer errors to serious print failures—sometimes even leading to nozzle crashes or clogs.
How AI Can Automatically Fix These Problems
This is where AI‑driven workflows show their real value.
When you upload a model for multicolor segmentation, the platform can perform an automatic geometry check as part of the process:
- Detecting holes and gaps in the mesh through printability analysis
- Applying automatic repair to reconstruct missing or broken surfaces
You don’t need to understand mesh repair. You don’t need to open Blender or specialized repair software. The AI handles it for you.
That is what low barrier really means here—not skipping learning, but removing the need to learn these technical steps at all.
Manual Color Segmentation vs. AI Color Segmentation: Why the Latter Is the Only Real Way Forward
Once you understand how multicolor hardware works and what a print‑ready model actually requires, revisiting the topic of color segmentation leads to an uncomfortable conclusion:
Manual color segmentation is fundamentally working against the system.
| Dimension | Manual Coloring (Traditional) | AI Coloring (Hitem3D) |
|---|---|---|
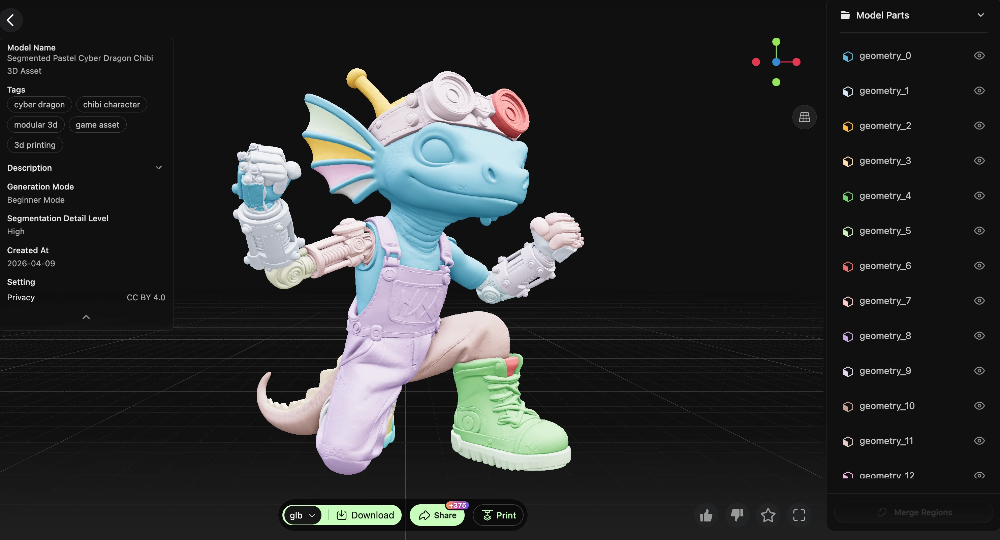
| Workflow | Paint layer by layer with brush in slicing software | Upload model, AI automatically identifies color regions |
| Time Cost | 30 minutes to several hours | 2-3 minutes |
| Learning Curve | Requires familiarity with advanced slicing software features + model repair knowledge | Zero门槛, upload and go |
| Model Requirement | Model must be watertight and manifold before coloring | AI auto-repairs geometry issues before segmentation |
| Revision Cost | Changing colors means re-painting from scratch | Non-destructive adjustments in Professional Mode |
| Output Quality | Jagged boundaries, prone to color bleeding at curved surfaces | Semantic segmentation, smooth boundaries, print-ready |
The biggest problem with manual segmentation is not that it is slow—it is that it forces two tasks that should be separate into a single, error‑prone process:
- Model repair (making sure the geometry is correct and printable)
- Color definition (telling the printer where each color should go)
Why should an average user need to understand non‑manifold geometry just to print a multicolor model?
That expectation is unreasonable.
The real value of AI‑based color segmentation is that it automates both steps—or more precisely, it packages professional‑level expertise into a one‑click workflow.
This is not a “better coloring tool.”
It is a fundamentally different workflow.
This Is Not a “Better Tool”—It’s a Different Workflow
Many people think of AI color segmentation as simply a faster painting tool.
That assumption misses the point entirely.
AI color segmentation doesn’t just change speed—it redefines the entire workflow.
Traditional workflow:
Download OBJ → discover geometry issues → learn mesh repair (or give up) → manually paint colors → print → discover color bleeding → repaint → reprint → …
AI‑based color segmentation workflow:
Upload model → multicolor segmentation → preview and confirm → export for printing
The second workflow removes four to five entire steps.
And every step removed is one less place where users get frustrated and drop out.
This is why we say model color segmentation matters more than hardware.
No matter how powerful the printer is, it cannot fix a model that was never properly prepared.
AI color segmentation turns model preparation from a specialized, expert‑only task into an automated process—and that shift matters far more than any hardware upgrade.
Conclusion: The Future of Multicolor 3D Printing Is Not in Hardware
Over the past two years, nearly all attention has been focused on hardware upgrades.
Material systems have improved, multi‑material units have matured, and full‑color printers have become more affordable.
But the real bottleneck holding multicolor 3D printing back has never been hardware.
It has always been the difficulty of preparing models.
A beginner who doesn’t understand mesh repair gets stuck the moment they encounter non‑manifold geometry.
An experienced user may still spend 45 minutes manually painting colors on a complex model.
A professional designer often doesn’t want to waste time on repetitive, mechanical coloring work at all.
AI‑based semantic segmentation doesn’t just make things faster.
It removes the barrier entirely.
When model color segmentation drops from 45 minutes to 5 minutes, and from “requires professional skills” to “upload and go,” multicolor 3D printing finally shifts from a niche hobby for a few into a practical tool for everyone.
That is exactly what Hitem3D is building.
Get Started Now
👉 Try AI Multicolor Segmentation Today: hitem3d.ai
Free to try. No installation required.